Recording Studio Monitor Setup: A Complete Guide
Setting up studio monitors correctly is the single most important step toward achieving accurate, translatable mixes. This guide covers nearfield vs midfield choices, optimal placement and the equilateral triangle, room treatment, subwoofer integration, and calibration — with practical tips for brands like Yamaha HS and KRK.
Key takeaways
- Choose nearfield monitors for small rooms; match woofer size to room volume.
- Always set up an equilateral triangle with tweeters at ear level.
- Treat first reflection points and corners with absorption and bass traps.
- Integrate subwoofers using the subwoofer crawl and a crossover around 80 Hz.
- Calibrate your system to 85 dB SPL using pink noise and an SPL meter.
- Use monitor-specific EQ and room control features to compensate for acoustics.
Nearfield vs Midfield Monitors: Choosing the Right Tool
Nearfield monitors are designed for close listening — typically 1 to 2 meters from the listener — and minimize the influence of the room's acoustics. They are the standard for most project and home studios because the direct sound dominates over reflected sound, giving you a clearer picture of the mix. Midfield monitors, placed 2 to 4 meters away, are used in larger control rooms and offer higher SPL and extended low-frequency response, but require a well-treated room to avoid coloration.
For small to medium rooms, nearfield monitors like the Yamaha HS5 or HS7 are excellent choices due to their flat response and detailed midrange. The KRK Rokit series offers a more colored, bass-forward sound that some producers prefer for certain genres. The key is to match the monitor size to your room volume: a 10-inch woofer in a small room will cause bass buildup and inaccurate low-end. As a rule of thumb, 5-inch or 6.5-inch woofers are ideal for rooms under 200 sq ft, while 8-inch or larger suits larger spaces.
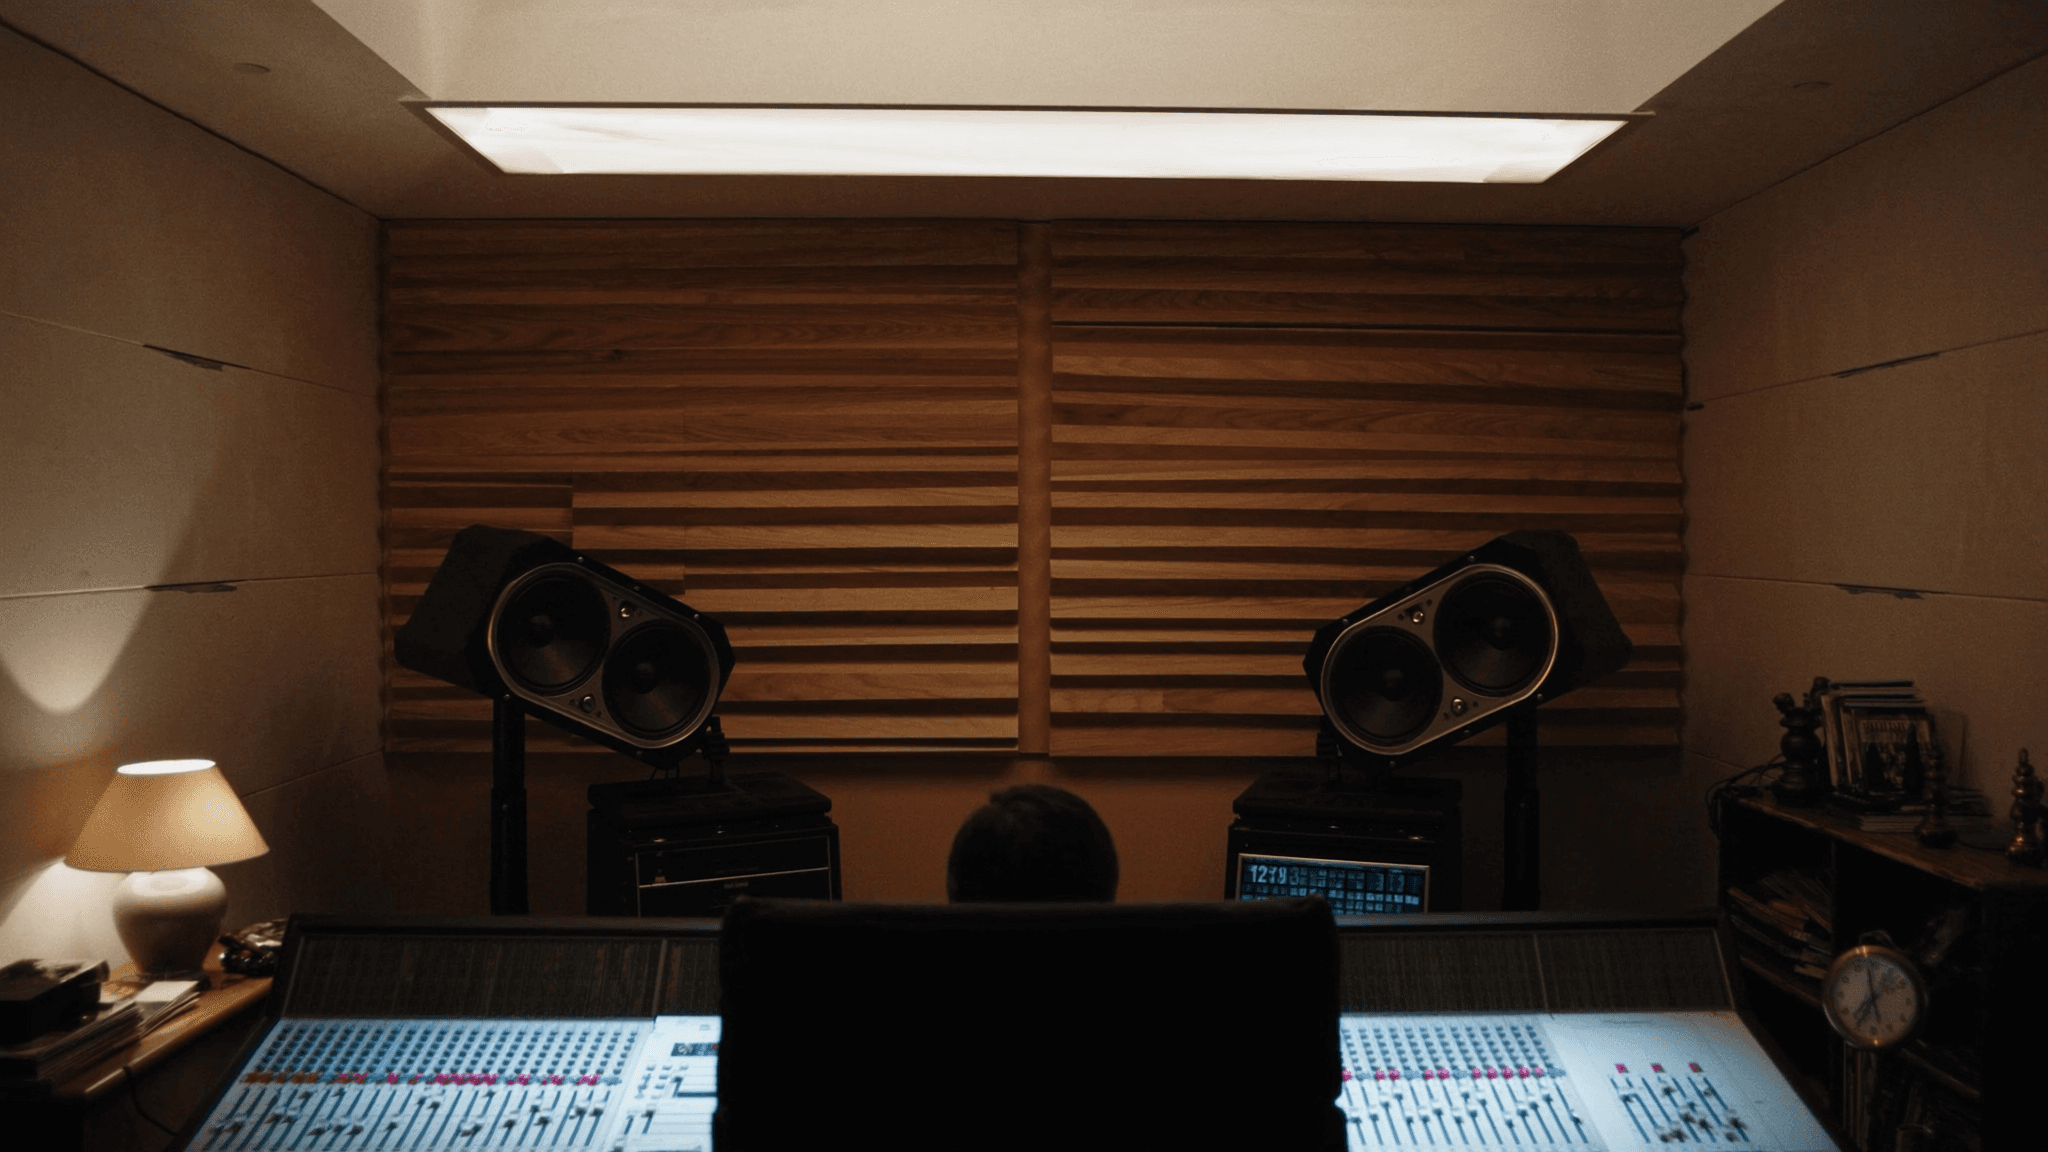
The Equilateral Triangle: Foundation of Accurate Stereo Imaging
The equilateral triangle is the golden rule of monitor placement. Position your listening position and the two monitors so that the distance between the monitors equals the distance from each monitor to your ears. For example, if your monitors are 4 feet apart, you should sit 4 feet from each speaker. This ensures a balanced stereo image and a precise phantom center.
Angle the monitors so they point directly at your ears — typically a 30-degree angle from the center axis. The tweeters should be at ear level when you're seated. If your desk or console forces the monitors to be too high or low, tilt them downward or upward accordingly. Avoid placing monitors on the same surface as your mixing console without isolation pads, as vibrations can cause phase cancellation and muddy the low end.
Room Treatment: Taming Reflections and Standing Waves
Even the best monitors will sound terrible in an untreated room. The first reflections — sound bouncing off walls, ceiling, and floor — cause comb filtering and smear the stereo image. Place absorption panels at the first reflection points on the side walls and ceiling. A thick bass trap in the corners controls low-frequency buildup, which is especially important for monitors with larger woofers.
For rooms with Yamaha HS series monitors, which are known for their revealing top end, absorption is critical to avoid listener fatigue. KRK monitors, with their built-in EQ adjustments (HF and LF trim), can be tuned to compensate for room issues, but treatment is still superior. A simple test: clap your hands in the listening position — if you hear a flutter or ringing, you need more absorption. Diffusion can be added behind the listening position to preserve a sense of space without reflections.
Subwoofers and Bass Management: Extending Low End Without Mud
Adding a subwoofer can extend your system's low-frequency response, but it introduces placement and integration challenges. The sub should be placed at a location that minimizes standing waves — often near a corner but not exactly in the corner. Perform a subwoofer crawl: place the sub at your listening position, walk around the room, and listen for where the bass sounds most even. That's where the sub should go.
Bass management involves setting a crossover frequency (typically 80 Hz for most systems) so that the monitors handle mids and highs while the sub handles lows. Many KRK and Yamaha subwoofers have built-in crossovers and phase controls. Use a measurement microphone and software like Room EQ Wizard (REW) to align the sub's phase and level with the monitors. Aim for a flat response from 20 Hz to 200 Hz. Avoid boosting the sub level — it should blend seamlessly, not announce itself.
Calibration: Achieving a Reference Level
Calibration ensures that your monitoring system reproduces sound at a known, consistent level. The industry standard is 85 dB SPL (C-weighted, slow) for mixing, but many engineers prefer 79-83 dB for extended sessions. Use an SPL meter or a calibrated microphone placed at the listening position. Play pink noise through each monitor individually and adjust the monitor's volume or interface output until the meter reads the target level.
For stereo, set both monitors to the same level. If using a sub, calibrate the sub to match the monitors at the crossover point. Many KRK and Yamaha monitors have rear-panel trim controls for fine-tuning. Document your settings so you can recall them. Calibration should be repeated after any room changes or monitor repositioning. Remember: a calibrated system gives you mixes that translate to other playback systems.
Practical Tips for Yamaha HS and KRK Users
Yamaha HS series monitors are known for their flat, uncolored response — ideal for critical mixing. However, they can sound harsh in untreated rooms. Use the room control switches (on the back) to cut high frequencies if your room is too live. The HS8S subwoofer pairs well with HS5 or HS7 monitors; set the crossover to 80 Hz and adjust the phase to avoid cancellation.
KRK Rokit monitors (G4 and newer) feature a built-in EQ with three settings: 'Mix' (flat), 'Create' (boosted bass and treble), and 'Focus' (mid-forward). For accurate mixing, use the 'Mix' mode. The KRK S10.4 subwoofer offers a variable crossover and polarity switch. Use the included K-RAK software for advanced DSP tuning. Both brands benefit from isolation pads to decouple from the desk.
Frequently asked
Should I buy Yamaha HS or KRK Rokit monitors?
Yamaha HS series offers a flatter, more analytical sound ideal for critical mixing and mastering. KRK Rokit series has a more colored, bass-forward sound that some find inspiring for production. Choose based on your workflow: HS for accuracy, KRK for creativity.
How far should studio monitors be from the wall?
At least 1 to 2 feet from the wall behind them to avoid bass buildup from rear ports. For front-ported monitors like some KRK models, you can place them closer, but still leave some space.
Do I need a subwoofer for a small home studio?
Not necessarily. A subwoofer can help if your monitors lack low-end extension (e.g., 5-inch woofers) but requires careful placement and calibration. In a small room, it may cause more problems than it solves.
What is the best way to measure monitor placement?
Use a tape measure to create an equilateral triangle. For calibration, use a measurement microphone (e.g., UMIK-1) and software like Room EQ Wizard to check frequency response and adjust placement.
How often should I recalibrate my monitors?
Recalibrate whenever you move your monitors, change room treatment, or notice your mixes not translating. Otherwise, once every few months is sufficient.
Building or upgrading a system?
SSOUNDS engineers and manufactures professional PA worldwide — from a single room to stadium scale.